
Rive Animation: Runtime Behavior & Integration Lessons
Animation runtime considerations with Rive, KMP and Compose Multiplatform, from a design perspective.
This is Part 4 of our Rive series. Start here with Choosing Rive for Mobile Animation.
In the previous post, we focused on how animations are built and structured in Rive. In this post, we will focus on how those animations behave at runtime, and some of the challenges that arise when integrating them into a KMP and Compose Multiplatform mobile application, from a design perspective.
Key Takeaways
- Artboards clip anything outside their bounds, but should still be kept as tightly cropped as possible.
- Gradients have their own transform and may not follow bone-driven deformation.
- Playback speed applied through nested artboards affects all animations inside that artboard.
Trimming Artboards to Avoid Confusing User Interactions
Artboards need to be trimmed to the animation, but they still must fully contain all visible shapes. Anything outside the artboard will be clipped.
When placing multiple animations on the same screen, oversized artboards can overlap and interfere with interaction. This is especially important for interactive elements, as overlapping artboards can lead to incorrect or confusing tap targets.
By default, artboards also have a gray background fill, so it is important to make it transparent before integrating the animations into the app, unless the animation covers the whole screen.
Leveraging State Machines
In Rive, animations are defined in timelines, while the state machine controls when and how those animations play. Breaking animations into smaller logical pieces helps keep the state machine readable and easier to maintain.
Independent animations in the same state machine
To keep things organized and manageable, we separated the animation logic into independent layers within the same state machine. This setup allows different parts of the animations to be controlled independently.
For example, movement, facial expressions, and UI elements can (and usually should) be driven separately. Having independent animations in the same state machine makes it possible to combine behaviors, such as moving through an environment while changing expressions or reacting to events.
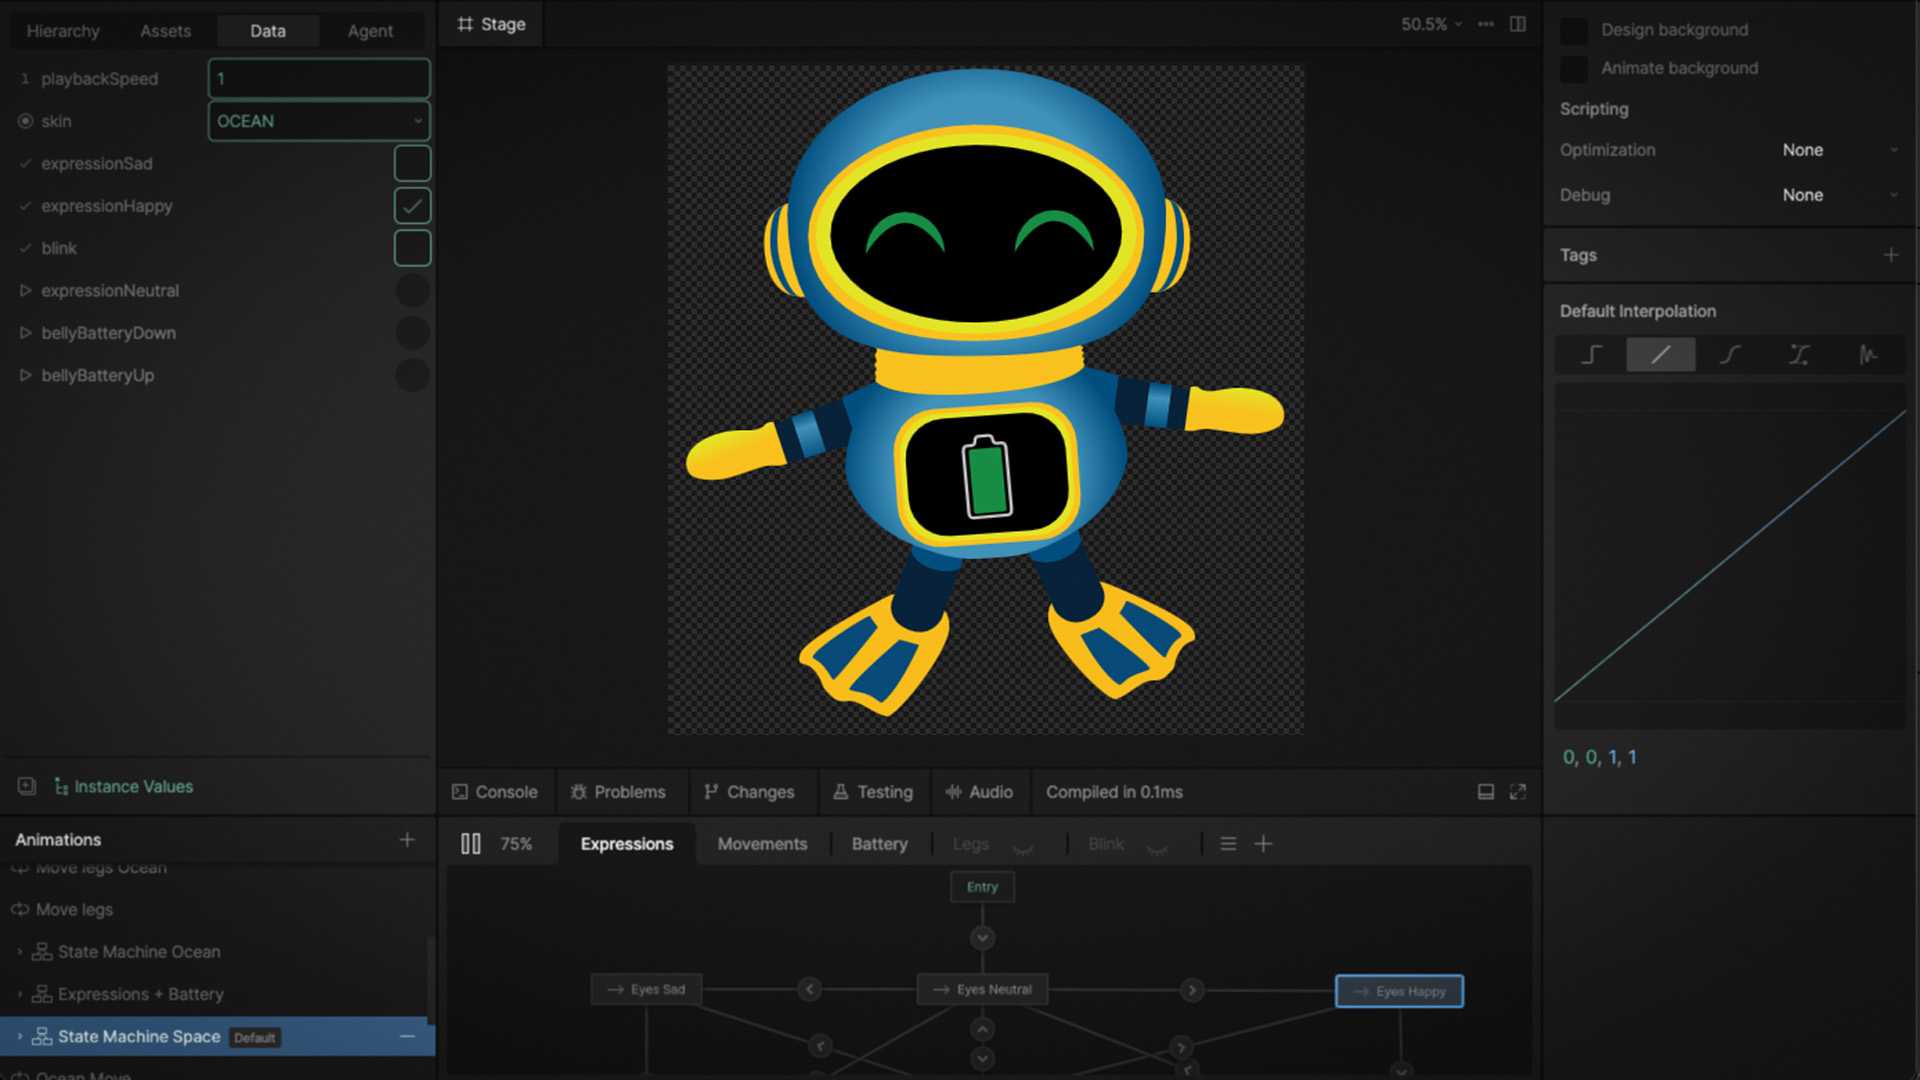
[Image showing the state machine used for switching between the different expression animations]
Using Data Binding
Rive allows animations to react to application data through data binding. This makes it possible for the app to be in control of different aspects of the animation state machine in real time.
We used different types of action triggers and inputs depending on the need:
- Triggers: for one-time animations (button presses, lever movement, battery changes).
- Booleans: for two-state behaviors (on/off lights or blinking, expression changes).
- Enums: for switching between predefined variations (outfits, skins).
- Images: to dynamically change content (props our mascot ELI is holding).
Binding these inputs to the animation makes it possible to reuse the same animation logic across different contexts.
Animating Gradient Behavior
Gradients posed some animation challenges for us compared to our experiences with tools like Blender.
Rive supports three kinds of fills: solid, linear and radial. However, radial gradients are always circular and cannot be reshaped to match non-circular forms, as one can do in Adobe Illustrator. As a result, the gradient cannot adapt easily to shapes that are not completely circular.
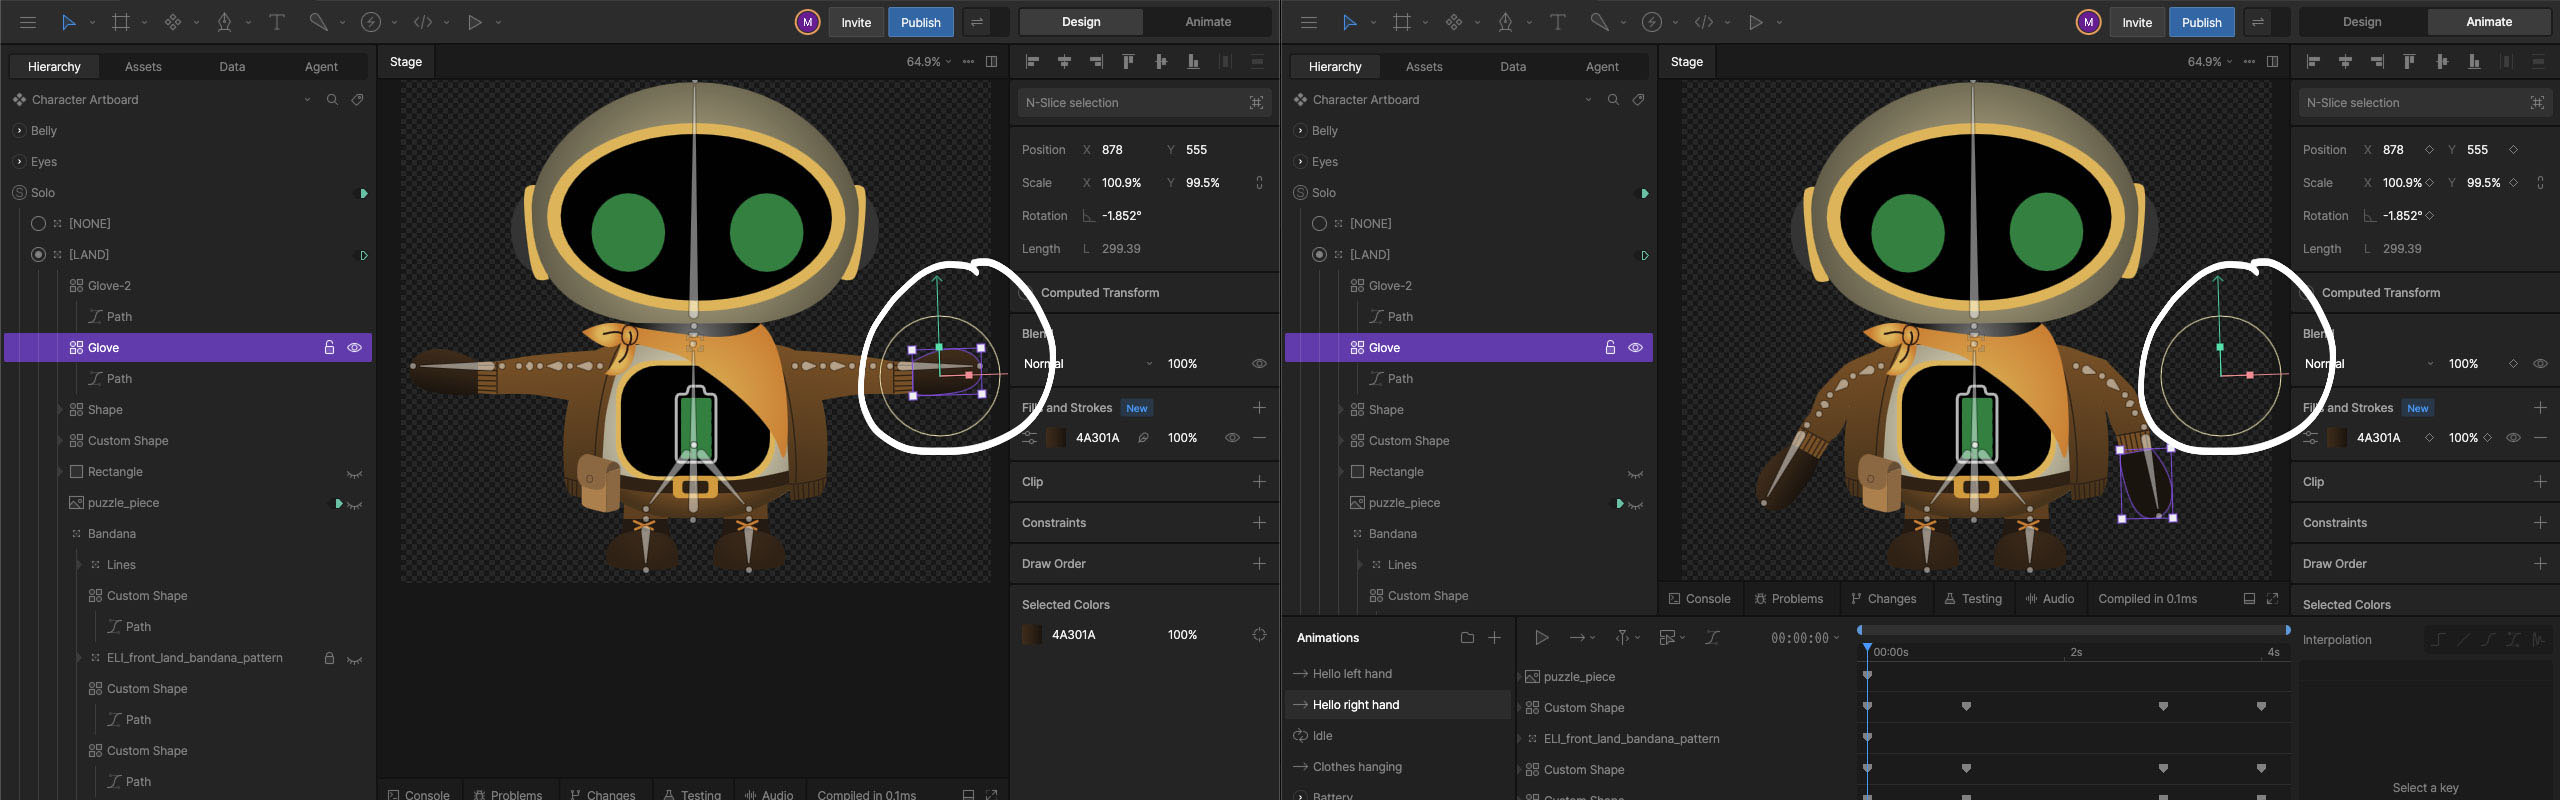
Gradients do not always follow bone-driven deformations as expected. If a shape has a gradient and is attached to a bone, the shape will move with the bone, while the gradient remains fixed. If the gradient needs to move with the animation, it must be keyframed manually.
To streamline this process, we found it best to complete the animation first and then adjust the gradients afterward. This avoids having to keyframe the gradients again if the animation changes.
These two images show how the gradient doesn’t move with the bones in the animation. In the first image the glove’s position is shown in design mode. In the second image, the bones have been posed and the shapes move with them. However, the position of the glove remains in the same spot. Because gradients have their own transform, they remain in place and have to be manually keyframed for them to show correctly in the animation
Tuning Animation Speeds
Animation playback speed is controlled a few different ways. In some cases, we needed to adjust animation speed programmatically, or synchronize it with external events outside of the Rive editor. This is possible using nested artboards, but by default, the playback speed applies to all animations within that artboard. This makes it difficult to control specific parts of an animation independently. In our case, we wanted to adjust body movement speed without affecting facial expressions. As a workaround, once we determined the desired animation speed in the app, we used that value to adjust the specific animation speed in Rive - so that only the intended animation was affected.
Conclusion
Rive is proving to be a powerful tool for building interactive animations, but working with it in a real application introduces a set of behaviors and constraints that are not always obvious at first.
Understanding how gradients, artboards, state machines, and data binding behave at runtime is key to building animations that are both flexible and predictable. The ability to drive animations through data and state machines opens many possibilities for interactive characters, fluid motion and complex, orchestrated animations.